Hello Guest it is December 21, 2024, 09:32:03 AM

Author Topic: Success! Mini Machining Center under Mach3 control - Video link  (Read 532902 times)

0 Members and 1 Guest are viewing this topic.

Offline Hood

*
  •  25,835 25,835
  • Carnoustie, Scotland
Re: Success! Mini Machining Center under Mach3 control - Video link
« Reply #30 on: June 16, 2009, 03:08:50 PM »
If you click on the banner where it says "See Mach3 Machines Here" you should be able to join the group, you can then choose to add a video and it should take you to your videos page. But its been a long time since I joined so the steps are maybe not exactly as I said.
Hood
Re: Success! Mini Machining Center under Mach3 control - Video link
« Reply #31 on: June 16, 2009, 04:42:00 PM »
Here is it . . . will be avail in HD after YouTube is finished processing, but is viewable now.

http://www.youtube.com/watch?v=NzY-OqckqpI

Special thanks to Hood for the re-homing info.  Also Vmax, RayL, Machinemaster, and others . . . 

BTW, lots of light cuts this go round. I will have a lot more power once I get the Viper drive (delayed waiting on parts  :()  With the 1800 line encoder, the Gecko faults with a normal cut.


That is seriously cool!  I hope to do something similar someday, if I ever finish my toolchanger....  I've got some simple parts I sell that could be done very easily like that.

Regards,
Ray L.
Regards,
Ray L.

Offline simpson36

*
  •  1,369 1,369
Re: Success! Mini Machining Center under Mach3 control - Video link
« Reply #32 on: June 18, 2009, 06:44:51 AM »
For those who asked, I will also be posting the swap axis macro and mayby some others.

After seeing Ray L.'s beautiful macros, I'm just too embarrassed to publish my sloppy code until I get it spruced up a bit . . . :-[

Hi simpson36,
  When you post your "improved" code, would you also include the original that worked for you before "cleanup"?   
It would be interesting to see what works without being "elegant".    Don't be embarrassed....  I'd just view the process as a "development".     ;)

Great details in the photos.  Nice setup!
Thanks,
Bloy

Here are the two basic macros with minimal comments added:

'M940.m1s 06/01/09 ©2009 www.theCUBEstudio.com
'Macro to make 4th axis become spindle
'use M950 to swap back and re-home


resetaxisswap()

SwapAxis(6,3)

End


'M950.m1s 06/01/09 ©2009 www.theCUBEstudio.com

'Macro to swap 4th axis back to A and re-home
'use after M940 to restore 4th axis to A axis

'Waits until axis stops moving before reset
'Moves axis 20 degrees if home switch is active
'Re-homes A axis
'Resets machine A to zero


While ismoving()
sleep 100
Wend


resetaxisswap()


'CHECK IF A AXIS HOME SWITCH IS TRIGGERED


If getLED(39) Then   

   here = GetABSPosition(3)
   
   here1 = here + 20
   
   Message ("Axis home switch triggered - moving off to " & here1)
   
   
   code "G0 A" & here1
   
   While ismoving()
   sleep 100
   Wend
 
End If


'RE_HOME A AXIS
   
DoOemButton(1025) 
   
While ismoving()
sleep 100
Wend
   

'RESET A AXIS TO MACH ZERO

SetMachZero(3)

End

http://thecubestudio.com/Mach3/macros/Mach3Mill/M940.m1s
http://thecubestudio.com/Mach3/macros/Mach3Mill/M950.m1s

Offline Bloy

*
  •  158 158
Re: Success! Mini Machining Center under Mach3 control - Video link
« Reply #33 on: June 18, 2009, 08:08:20 AM »
Thanks loads!
...just a question about the motor mount parts...did you bead-blast those to get the color/texture?  Or maybe you vibrated/tumbled them?   You might have already mentioned someplace but I didn't see how you "finished" the parts.

Nice!

Simpson36, I'll probably never make the "fitting" that you carved out in your super video, and the actuall G-code in its original state would never be used "as is" by me.  However, a step by step study of that g-code in conjunction with the macro usage might really make this process come clear.
.....you've undoubtedly got many things going on, so with reservations, am I asking too much  to post the actual g-code running in your video.?  Would this be possible?  Somehow, in the future, in some way I hope to return your generous favors.  (Continuing to compliment your work as you demonstrate it just won't suffice...:)  )

Thanks again,
  John
« Last Edit: June 18, 2009, 08:40:32 AM by Bloy »

Offline simpson36

*
  •  1,369 1,369
Re: Success! Mini Machining Center under Mach3 control - Video link
« Reply #34 on: June 20, 2009, 02:53:56 AM »
Bead blasting is for delicate stuff. I just use fine sand and then coat with a product from Eastwood called satin clear for bare metal. There is not a lot of paint that will stick directly to aluminum. This is an amazing product  . . expensive though. 'Self-etching' or otherwise 'stick to bare metal' products are caustic (have acid in them)  . . . .  VERY nasty stuff . . respirator only, please!


As to the G-code, it calls a few other macros and internal subs and uses a lot of variables within the code itself so it will be very difficult to decipher without a lot of proper commenting.

I used to program a lot . . . 25 years ago . . and I was sloppy even then about commenting programs. A well deserved criticism I would get from colleagues was that my programs were difficult if not impossible to maintain because I would do very complex things and not explain what I was doing or how. I often could not even go back and figure out WTF I had done  ???

If I can get time to comment the code sufficiently for it to be understood and maintained in some reasonable way, I'll make it available individually for those who may want to peruse. I do not have time to answer a lot of questions about it though.

Offline Bloy

*
  •  158 158
Re: Success! Mini Machining Center under Mach3 control - Video link
« Reply #35 on: June 25, 2009, 11:24:33 AM »
Sure!  Put me down as one of those individuals who will graciously accept your code for the sole purpose of solving a puzzle.   I'm one of those that use ink and wouldn't think of asking another for the answers........yah, sure. ;).

Seriously, I promise not to ask ANY questions(within the first year). 

What you are doing control-wise, is exactly what my machines are looking for.

Thanks,
John (bloy)

Offline simpson36

*
  •  1,369 1,369
Re: Success! Mini Machining Center under Mach3 control - Video link
« Reply #36 on: June 27, 2009, 06:13:03 AM »
Update:

I have the Viper drive and it will run the motor fast enough. That's about the only positive thing I can say about that product at the moment. I have some more homework to do on the Rutex drive, but I think I'll try one of those next.


The final design for the new head is finished and the material, bearings, and sensors have arrived for the final prototype. Stay tuned . . . .

Offline simpson36

*
  •  1,369 1,369
Re: Success! Mini Machining Center under Mach3 control - Video link
« Reply #37 on: June 27, 2009, 06:29:57 AM »
Sure!  Put me down as one of those individuals who will graciously accept your code for the sole purpose of solving a puzzle.   I'm one of those that use ink and wouldn't think of asking another for the answers........yah, sure. ;).

Seriously, I promise not to ask ANY questions(within the first year). 

What you are doing control-wise, is exactly what my machines are looking for.

Thanks,
John (bloy)

I just found an early version of the g-code prior to using the new macros and variables. It has only the swap and swap back macros that I have already posted. This code is *somewhat* decipherable even though it is not numberd nor commented in any reasonable fashion, and the treading and peck drilling are verbose g-code for tuning purposes. But if you want to noodle over it, e-mail me your e-mail address and I'll send it to you.

Offline simpson36

*
  •  1,369 1,369
Re: Success! Mini Machining Center under Mach3 control - Video link
« Reply #38 on: July 06, 2009, 08:04:31 AM »
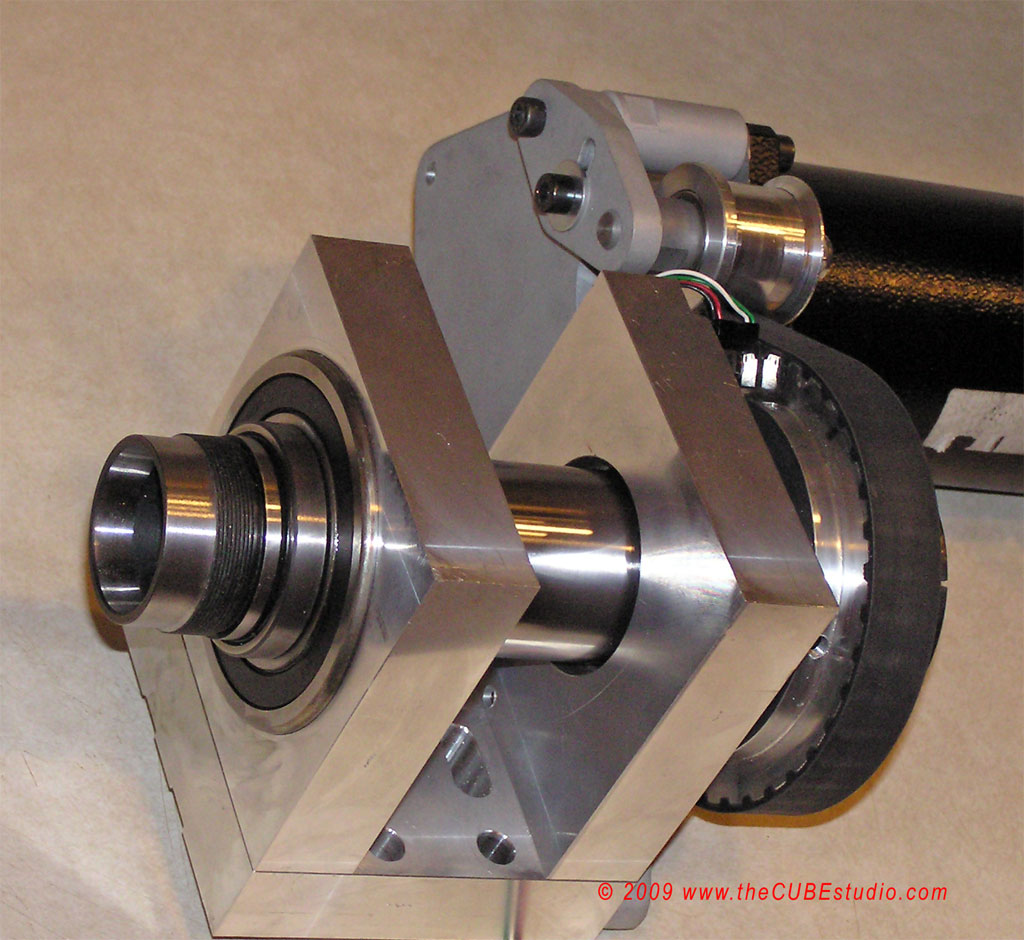
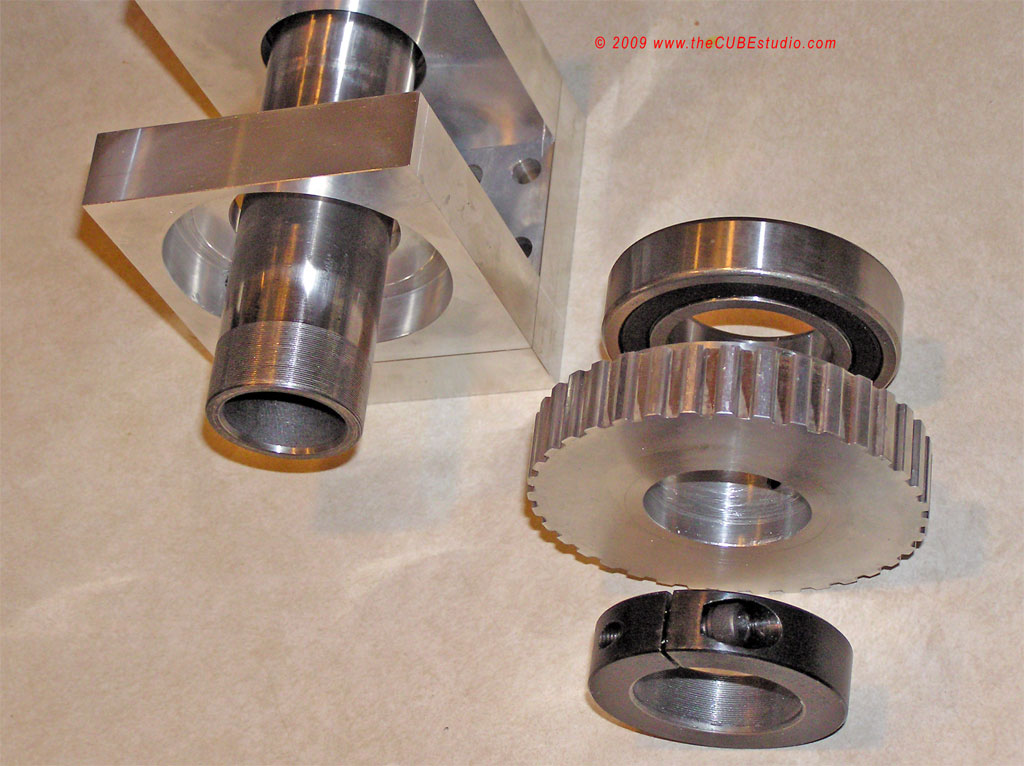
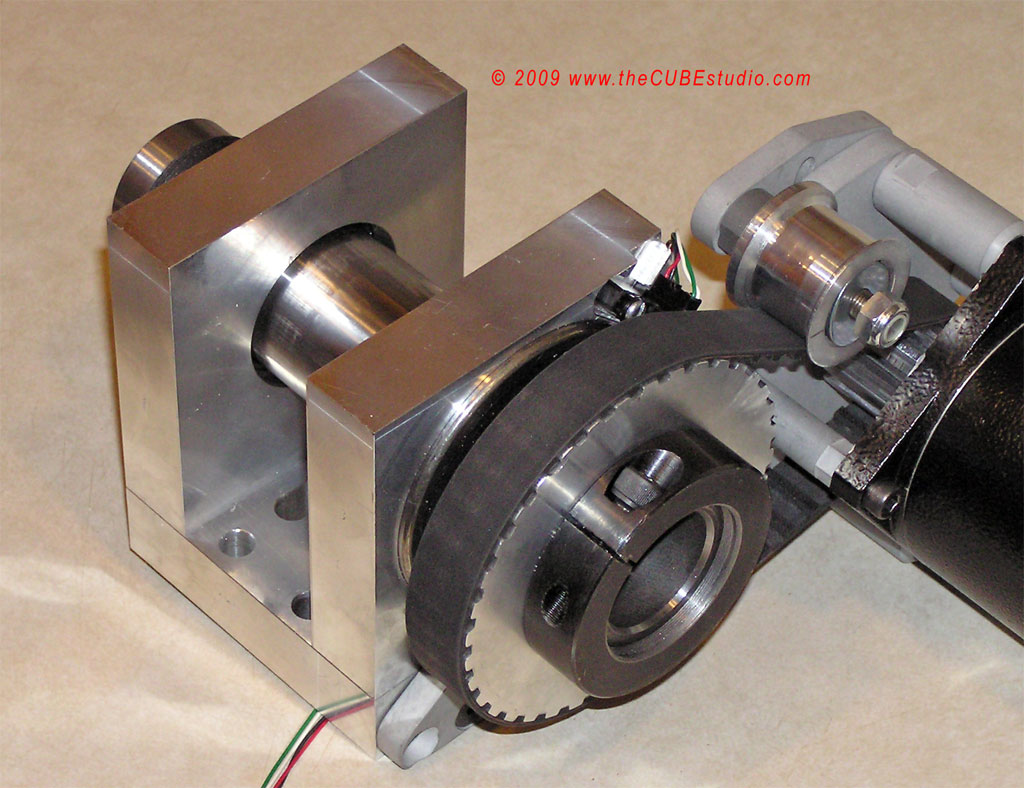
Update: 4th axis completed. This will run at a max of 1,300 RPM or 2,000 RPM depending upon which motor pulley is used. Should be able to run all day long at top speed. There is a steel part that I make from 3/4" 12L14 steel at 1,800 RPM. it has 1/4-28 internal threads and flats on each side. This final iteration of the 4th axis will be expected to turn, drill, tap and cut the flats using one continuous program. We shall see . . . . 

Basic drive parts moved over from previous prototype:


Final assembly:


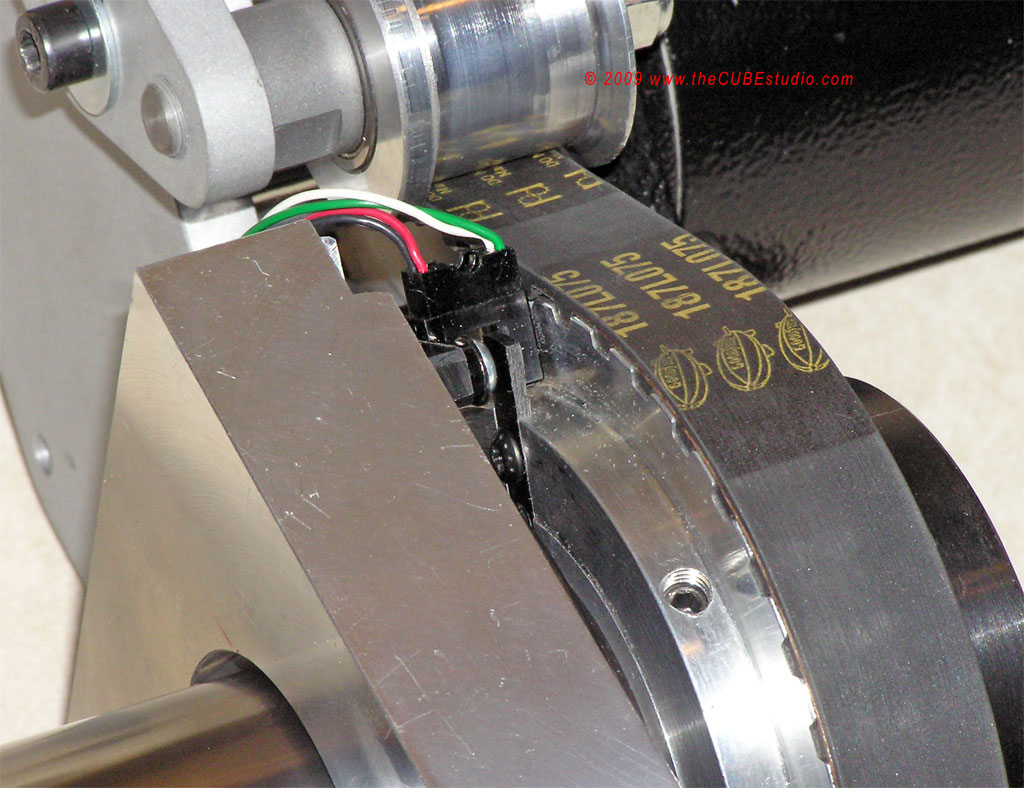
Homing sensor moved to back and oriented down to keep out as much swarf as possible.


I have my new Rutex servo drive and so far it is doing everything it claims to do, so I should get full speed and power from the motor. When I get it all back on the mill, I will make one final video and post the link. Questions, comments , criticisms or suggestions welcome.

vmax549

*
Re: Success! Mini Machining Center under Mach3 control - Video link
« Reply #39 on: July 07, 2009, 05:56:22 PM »
SImpson you may want to consider a sleeve in between the inside of the two bearings.  AND compress the bearings together(preload). This will allow BOTH bearings to take the side loads instead of just the outer bearing.

Looking GOOD dude, (;-) tp